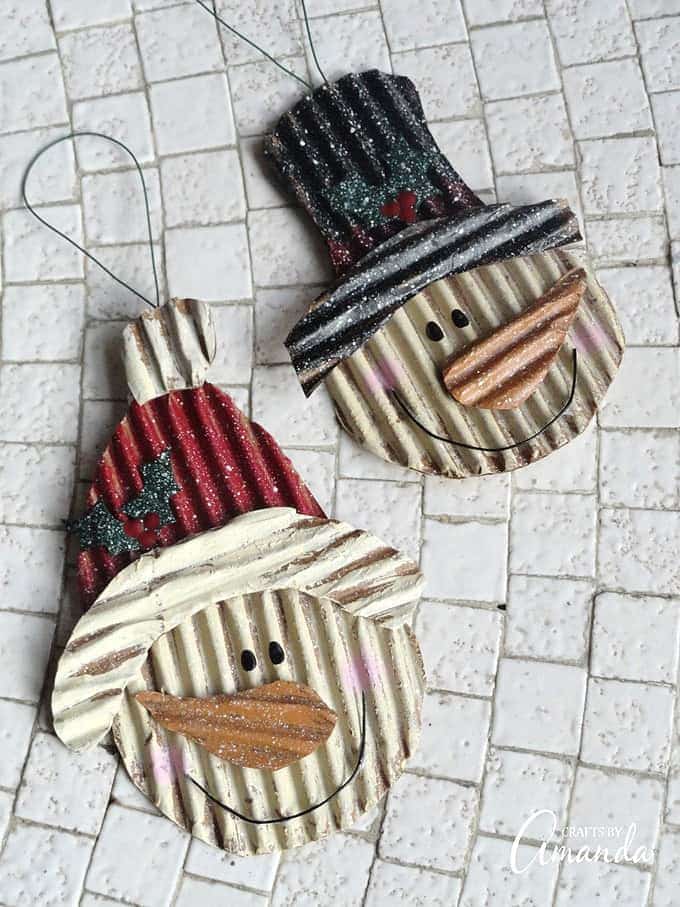
Every year I make at least one new snowman ornament and have found these corrugated cardboard ones particularly popular – they remain among my favorites on my Christmas tree year after year!
Why We Loved This Project Snowmen make charming decorations. From snowmen made entirely from snow to handcrafted decorations like this mason jar lid snowman, snowmen remain timeless decorations that bring joy year-after-year. For instance, these ornaments I made out of corrugated cardboard from a cardboard mailer still hang proudly on my tree ever since their creation in 2011.
These boxes have been held together with glue dots, and I have never experienced an adhesive issue during their nine year existence; even with corrugated cardboard’s rough texture!
Making cardboard snowman ornaments These step by step photos and instructions are here to help you visualize how to complete this project. Scroll down and print off our instructions!
At first I used a photo as inspiration to draw ornament shapes. If you’d like to try these yourself I have included a pattern. Coincidently enough I had just received a book in a corrugated cardboard mailer! Perfect!
After cutting out my ornament shapes, I practiced painting them onto scrap cardboard. Since my aim was to achieve an aged wood effect with my painting technique, I used several strokes with Americana’s Desert Sand in a brush before drying my brush on a dry cloth and lightly brushing out any creases that developed.
Once I felt confident enough with my paint skills, I proceeded with painting all the pieces.
As my crafts were drying, I cut some holly leaves from an old silk plant I had lying around; felt or fabric would also work great! Once cut out, I placed them on some scrap cardboard and painted them using Hauser Dark Green paint.
Once the black hat was dry, I added another touch by painting its band with Deep Burgundy paint. Once that was complete, splattering time came: thin out some white paint with water, dip your toothbrush in it, dab off excess on a soft cloth then drag your finger across its bristles for an eye-catching splatter effect!
I made these mouths using floral wire, shaping it to form two smiles before painting them black.
Now to put everything together! For this step I used Instant Tacky Adhesive Dots. Be careful not to touch the sticky dot itself; simply press its plastic backing against whatever surface you wish for it to adhere on before applying pressure and peeling off its backing after pressing into place – the dot should remain in its spot once pressure has been applied and peeled off; press items against whatever you’d like it to adhere too (the photo shows two different size dots being used on her nose).
Once everything is arranged using dots, add the finishing details. Use a paintbrush dipped in red paint to add holly berries as decoration on its handle end for this step.
To add smiles, squirt some instant grab glue onto a scrap cardboard piece and dip both ends of a smile into it before placing it onto the snowman’s face.
Use a small scruffy paintbrush to dab on pink cheeks, then dip the handle end in black paint for dotting eyes – they may not come out round due to cardboard’s ridge, but I still think they look cute!
As for hangers, I used floral wire again but, due to the shapes of ornaments, created two distinct kinds. With one type, I created a loop and twisted both ends before rolling them up with instant grab glue before inserting that hanger into cardboard at the top of snowman hats.
As I did not think there would be enough stability, I opted for making a twist higher up so I would have two ends to work with and dip these in instant grab glue before inserting them in cardboard on both sides of the top of the red hat.