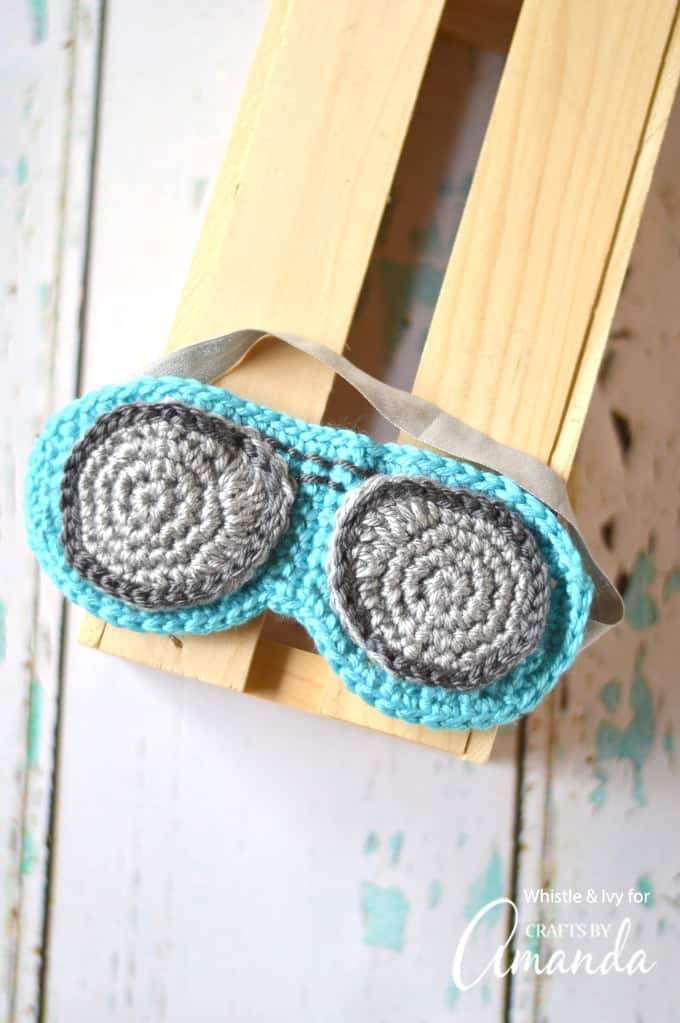
Today I am sharing this adorable and comfortable Aviator Sunglasses Sleep Mask Crochet Pattern. While most nights I can fall asleep quickly (when not interrupted by baby waking me several times!), sometimes extra help may be required, and this sleep mask offers both comfort and assistance! Plus who could resist those adorable aviator sunglasses?! So grab yourself some cozy Crochet Sandals, sit back, and let’s get crocheting!
Hi CBA readers! My name is Bethany from Whistle & Ivy.
I designed this Aviator Sunglasses Sleep Mask with only one layer, not including lenses, but if you would prefer something thicker, just slip stitch a separate back piece to the top piece after sewing on lenses and embroidering a connecting piece.
Fold-over elastic is especially comfortable and won’t pull at your hair!
Are you looking for more free crochet patterns? Perhaps these striped coin purses or this simple wrap clutch may interest you!
What You Need to Create an Aviator Sunglasses Sleep Mask:
H Hook and Medium Weight Yarn in three colors. In addition, Darning Needle and Fold-Over Elastic are required (approx. 12 1/4”).
Abbreviations: US Terms (stitch and chain). Single crochet. Dc = Double Crochet
Hdc = Half Double Crochet Sc2tog = Sc decrease Tc = Triple Crochet
Sl St = Slip Stitch
Gauge = 19sc=5′. WATCH THIS VIDEO FOR A CROCHET PATTERN THAT REPRODUCES THE AVIATOR SUNGLASSES AND SLEEP MASK, CLIP IT BELOW FOR MORE DETAILED INFORMATION.
Left Lens: Select 1st color option when ordering Left Lens.
Begin with magic ring. Ch 1, Sc 8 in ring, joining them using slip stitch. (8 stitches). Sl stitch in between. 8 stitches) mes 2. Ch 1. 2 SC in same stitch followed by SC in each of next 7 stitches joined using slip stitch (16 STCs). Sl stitch for joining between stitches (16 SCTS).
3. Ch 1. Sc in same st 2 SC in next stitch *SC 2, SC *work 7 times in total until all 24 SCTS have been covered
4. Ch 1. Sc in same stitch. Sc in next stitch, 2 scs, then *Sc 2, 2sc in next st* work three times until work reaches bottom edge of footstrap (32 stitches). Sc 3. Join. (32 Stitches).
Finding the Right Lens: Selecting 1st color lens as primary.
Begin with magic ring (CH1) by working eight single crochets into it and joining with a slip stitch (SCs), creating 8 stitchs. (Eight Sts). In Step Two (2 SC in same stitch, 2 SC in next 7 stitches; join all together using slip stitches (L16St). Step Three (16 Stits). Continuing as Step Two in Row Three but now starting in Ch 1, Sc into same sc, 2 Sc into next stitch; repeat process 7 times until 24 sts are worked. (24 Sts). Step 2. Continue working 2 SCs into same stitches; join with slip stitch for joining. (24 Sts). Step Three will give rise to 24 Stitches). Step 4. Finally join using slip stitch finishing the last stitch in Row 3. *Sc, 2 Sc in same st, repeat *and Ch 1) Repeat Step 3. For this step 3; when all stitches have been joined use sc a starting chain 1. Ch 1 to begin work 1 SC then 2 SC in next stitch, repeat as the previous step (16 Stitches) If necessary use double crochet 16 Stitches each time from Row 5-12 stitch until complete (24 Stitches). Step 5. Continue in Row 6. (24 Stits).
4. Ch 1. Sc in same stitch. Sc in next stitch. 2 scs are worked in next stitch, working *Sc 2, 2sc in next st* three times for total of 27 stitches in total. Sc 3. Next row should consist of 2dc in next st, followed by two Tc stitches followed by two Dc’s in subsequent stitches (2 Tc’s then 2 Dc’s followed by Hdcs for 32 Stitches total – Join with slip stitch).
Use second color for this effect; lightly swipe around both lenses leaving an extended tail.