My gardening has definitely improved over the years. When my husband first married me, he used to call me black-thumb due to my inability to keep houseplants alive – not due to gardening skills but rather neglect. Without fail, the poor things would die of thirst if left alone! No longer though; now that’s no excuse!
Though my garden may not be large, I do boast a flourishing herb garden and several front yard plants that have done exceptionally well despite last year’s drought conditions. Indeed, my confidence in growing flowers has grown so much that I wrote two articles on them at P&G Everyday and Homemade Simple for your reading pleasure if interested. Check them out “Planting Your Own Rose Garden” and “All About Tulips”.
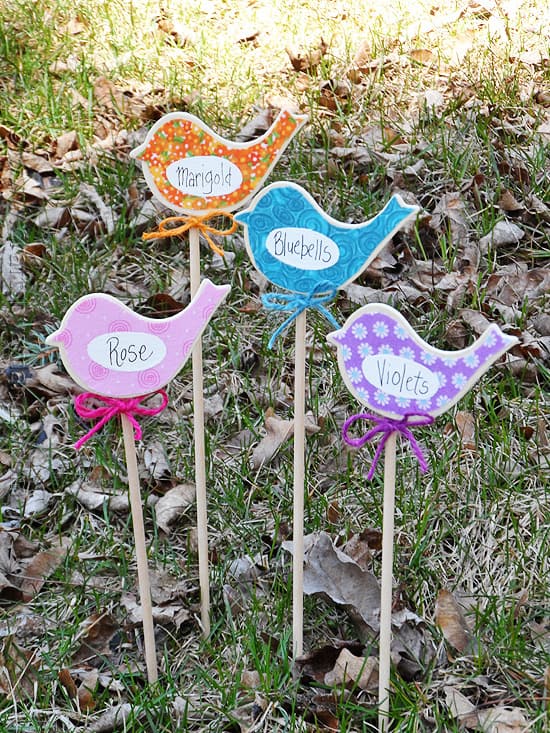
So it should come as no surprise that garden markers are one of my favorite warm weather crafts – they add so much whimsy and fun to any garden!
These plant markers are super easy to make! I used cute bird-shaped wood cut-outs from Michaels and fabric from WalMart (fat quarters located near their fabric/craft department). However, an anonymous source recently informed me that on June 28, 2013 most Michaels stores nationwide will begin carrying 14 types of craft fabric such as cotton canvas burlap felt faux fur crushed velvet and tulle! As a crafter myself this news came as music to my ears!
I also used some colorful jute cord, and you’d be amazed to find its variety of colors! This can be found at Michaels in the jewelry department.
Once you’ve selected fabrics, trace the bird shape onto each.
Cut along the lines approximately an eighth of an inch for cutting out these bird shapes from fabric. When attaching fabric, ensure it is smaller than its respective wood bird form for best results and leaves an uncluttered border around its edge.
Next, use decoupage medium like Mod Podge Outdoor to attach fabric to the birds. Apply decoupage only on the back of fabric, and attach it directly to wood; don’t apply any more decoupage over top just yet; treat this step like you are just gluing the fabric into place.
Once your fabric covered birds have set completely, use a liner paintbrush to draw an oval in the center of each fabric-covered bird and allow that layer to dry completely as well.
Now you will need a fine tip pen. Micron pens can be found online through Amazon and Michaels in their artist section; though more expensive they make fine line work easier. Sharpies could also work but be sure to let it dry for several hours before continuing – they have a tendency of running and smearing when decoupage medium or sealer is applied over the top so don’t rush!
Finish the bird off by giving both sides two coats of Outdoor Mod Podge and attaching a dowel using E6000 adhesive (hot glue will not hold up long enough), before tying twine into a bow beneath its body – all while adding decorative twine bows around both.